Sunday, May 8, 2016

Nearing the finish line, really

I spent way too much time in the cramped and dark downstairs of the Big House, milling stair treads and pickets.  With these short lengths I was able to reclaim almost all of the old boards we salvaged from the previous deck, and I also cleaned out a bunch of short lengths from the other deck, that I could not bring myself to throw away.  There's not a lot of use for 30" pieces of redwood, but then when it's almost $5 a foot (if you could buy it--the new stuff is much less dense and tightly grained), it's sort of like tossing out $10 bills.  No, I can't.

So I emerged this afternoon to find Muggs blasting away on the lower stairs and railings--he's got special cloth over the landing, ready to add it below the joists to help keep the weeds down.  I neglected to get a photo of the wild-cucumber vine that had started coming up underneath the plywood that had been covering the landing for weeks--this is our answer to Kudzo, I guess--I took a half hour the other morning and yanked at least a cubic yard of the stuff off of our thimbleberry and blackberry, where it had happily blanketed the bushes...
With clear-enough weather I was able to finish the top of the slats and the top of the stairs (minus the newel post detail).  You can see (despite the blurry pic) that the angles and planes all work out right enough, something we had not completely visualized beforehand, but had let our subconscious work on it long enough.  I still have to trim off the right-hand top rail to match the left-hand one.  That left post is new, since we decided on symmetrical post heights with chamfered tops, and thus had to re-seat a new one (complete with notches along the stair stringer to accommodate the bolt-heads for the Simpson hardware).

Here's the completed field of rail slats--it's tighter or less airy than on the Big House deck, but I varied the spacing so I hope the effect is not too blocky or wall-like.
And here's the view from below, this evening, showing where we are--pickets and stair treads are the two big items left (trimming the rail caps doesn't count).  This photo shows the 2 x 8 pressure-treated side board that Muggs added in the afternoon to protect the stair stringer and redwood posts from dirt--if there is a planter put in, its edge can be attached to this buffer board, with the idea being that the more air flow / less ground-to-wood contact there is, the longer this deck will last.

Now that there is a lower stair post, I can re-install the list switch I removed in the demo phase, and (I hope) figure out the wiring for the outdoor lighting.  The more I look at this, the more stoked I am about the way this is turning out.

What time is it? Milling time.

I've been referring to "milling" quite a bit in this blog, and I realize I haven't actually said much about the process, which distinguishes my whole approach from that of most other builders. Typically you just buy wood, cut it, and install it, and this makes sense for a lot of projects, but as I have mentioned, when the stuff that you demo'd is precious (both expensive and of higher quality than you can buy today), then I am willing to put up with some nail holes and slight blemishes for the sake of the tight grain of using old-growth and not letting it find its way into landfill.

The process starts with the demolition--where a crew might just go in and destroy the old wood, tossing it into a dumpster for speed (what Tim G and his boys did on the Big House siding, even when I offered to pay them out of my own pocket to salvage the gorgeous old shiplap siding, which they replaced with green crap that is bleeding through the paint-over, just ten years later), I take advantage of the deteriorated underpinnings and lift the redwood boards out with nails still either attached or Sawzalled off.

 Then it's piled on the badminton court for de-nailing.  This is what's left--thousands of nails (and bits of tar paper that had protected the joists), removed with the tools to the lower right: hammer, cat's-paw, 1/4" punch, and fulcrum-scrap for leverage.  If you just cat's-paw the nail-heads out, you leave a huge gash in the top surface, so I use the punch to break the connection between the head and the wood, and then pound the nails or nail-fragments out enough to get the claw of the hammer in securely and with minimal damage.
After schlepping the stack of de-nailed boards down to the shop (the saw is too damned heavy to move, and besides I have built an outfeed table onto it--and hey, where else can you do this when it's raining outside?), it's time to run them through to trim off the decayed rough edges.  Because these boards were not subjected to as much wet as the ones I dealt with at the Big House, I only shaved off a saw-kerf or so--turning 5 1/2-inch boards into 5 1/4-inch.  The ones with bad knots or checks became 4" deck boards, or 2 3/4" stair-tread mids, or 1 7/16" pickets.  And yes, that is a push stick--I never EVER get my hand past that spinning blade...

It takes a while to make pile of sawdust like this under the saw, and yes, I do wear a dust mask, since I haven't figured out how to make my dust collection / shop vac work here (it does with the planer though, see below).
This planer has become my workhorse--I had bought a slightly fancier one to replace Muggs' old Delta (for which parts are no longer available)--but it developed a weird and so-far-undiagnosable electrical problem (sometimes it runs great, then it stops for no reason) so I ended up having to buy another one to finish the Big House deck.  I take care not to shave more than 1/32" at a time (half a turn on the knob)--this means lots of passes through the machine, but longer life and fewer problems.  To the right you can see the ever-growing pile of off-cuts from the milling process--kindling for years to come.  The hose goes to a chip-collector in line with my shop-vac.
To figure out where to start and stop the planing, I made myself a feeler gauge, as the boards are all over the place in terms of thickness: some of the ones from Doffy's deck were 1 5/8" thick, a typical piece of lumber that is "nominally" 2-by is 1 1/2" thick, and sometimes even less, and even with our tight joist spacing I don't use anything thinner than 1 7/16" on decking.  Sometimes it takes extra planer passes to get past the gouges and fissures, but 1 3/8" makes perfectly acceptable picnic tables so I keep it for that purpose.
Just for fun I emptied my planer chip-collector drum in the same place, and have these impressive piles to show for it.
With the boards sized and smoothed, the last step is to dress the top two edges, and I move them off the planer and onto the sawhorses so that I can run my hand router / laminate-trimmer with a roundover bit on it.  This is a totally cool little item that has a 1/4" radius cutter spinning vertically, and below it is a small disc roller that follows the flat edge of the board and keeps the roundover running evenly and neatly, as long as proper pressure and speed are maintained.
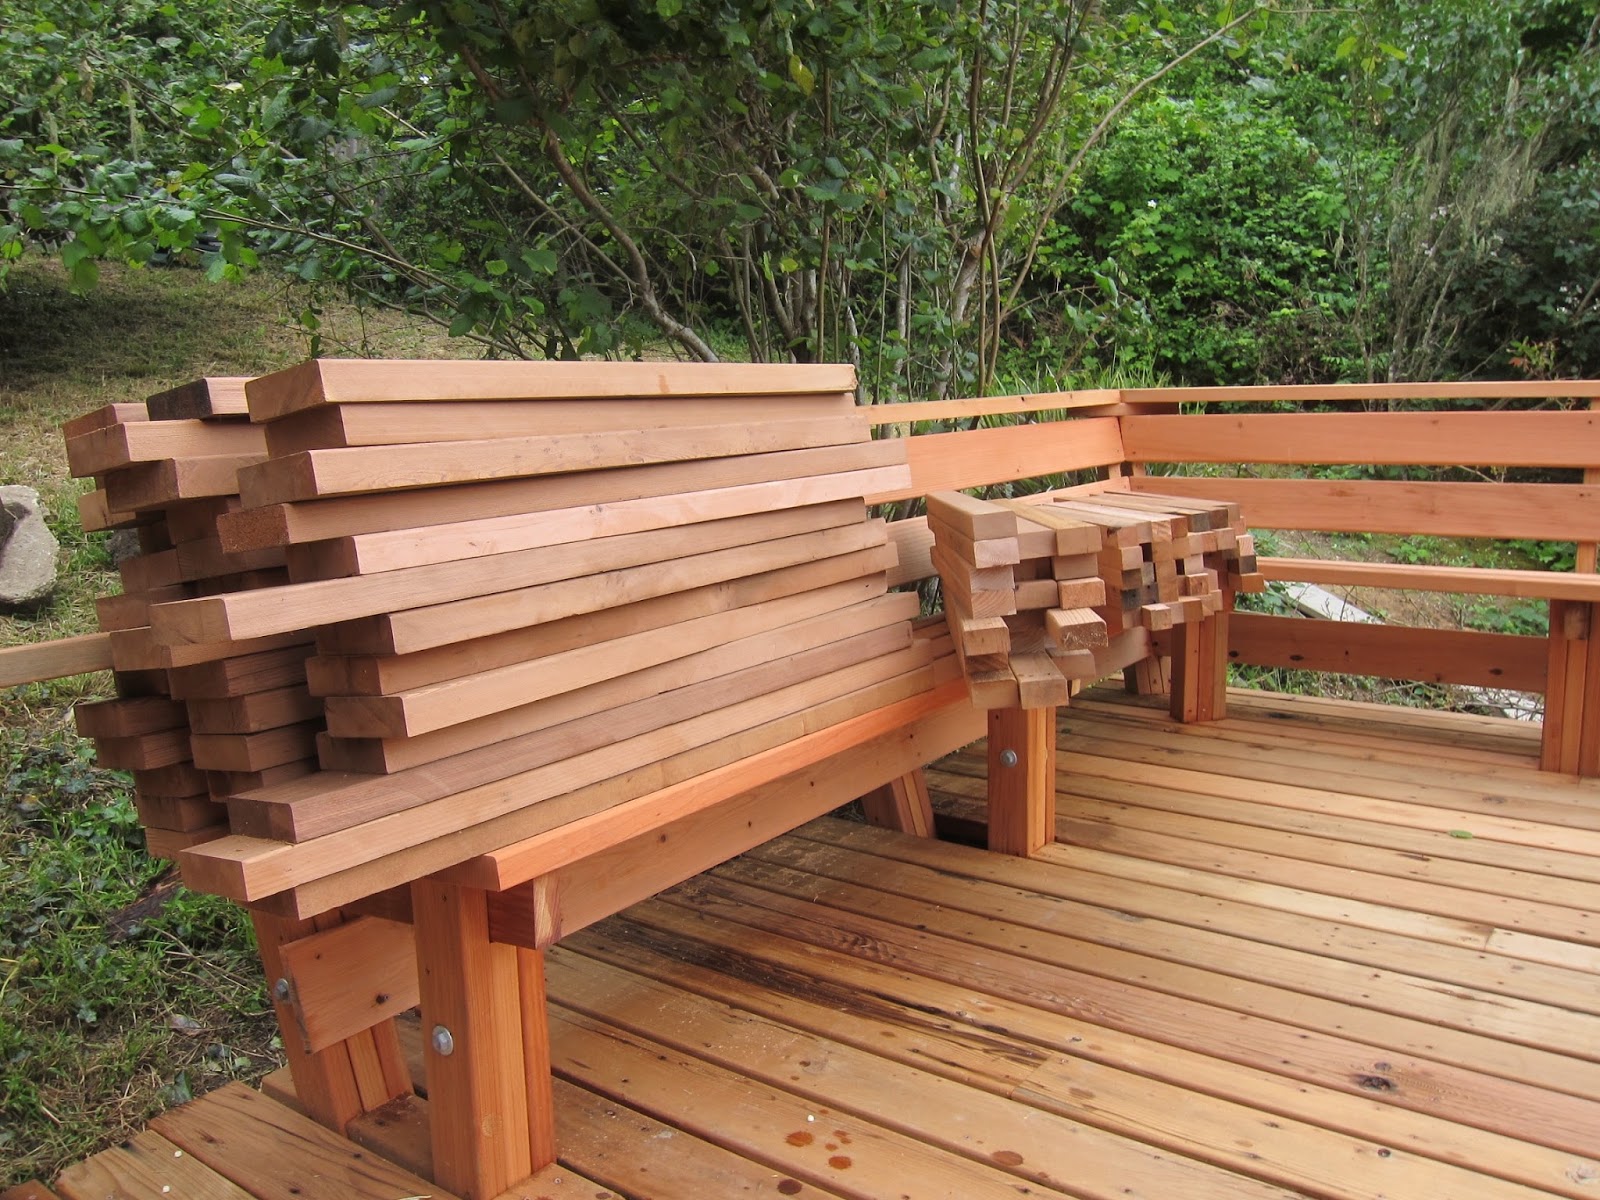
And as if by magic, the boards get schlepped back up over the badminton court and down to the job site!  Here's what awaits me tomorrow: on the left, 38 stair tread boards (4 1/2" wide by about 39" long), then in the middle, 19 stair tread skinnies (2 1/2" x 39"), and on the right, about 50 of the pickets (1 7/16" square, about 30" long).  I'll bolt the chop saw to a piece of plywood as a table, and then screw in a couple of stops so I won't have to measure after the first one.  I've already cut 3" x 12" strips of Vycor membrane for the stair stringers, so I hope to have upper stairs finished before I have to leave for my tutorial tomorrow afternoon.  There will have to be some notching of the boards to accommodate the posts, but I think the results will be worth the extra work.  Milling!

Stair trim, rail slats, lower stairs...

We've put in some mega days, although the rain has changed plans a couple of times (not a good time to operate chop saw outside).  I've been pretty tired in the evenings so this is from a couple of days ago.

The way we envision the stairs--vertical pickets--requires good surfaces to attach them, so Tom has had to do some serious parallelogram-cutting.  Once the posts are plumb, and he has a long 2 x 4 he can run at the right height down the stairs, he can then clamp it, triple check it, and then scribe the cut-lines along the posts.  It's finicky work but it is paying off.
Of course at the top of the stairs there's more finicky cutting to do.  We have decided to leave the top posts long as newel posts, and chamfer them to soften the tops.
This work on the landing was not anticipated in the original estimate, but it will finish the project well.  Tom is working next to the lower stairs, bolting in the post that will delimit the edge of the landing; to the left is where you access the berry patch (despite the deer, who only snacked on the low shoots, the crop will be great after the pruning and the rain).  I think a planter would fit well here (where before there was just the bishop-pine stump that'd been covered with ivy), as that would use up some of the dirt we had to excavate...
I set up the little chop saw to cut the compound miters for the bench backs / slats, though in this shot I haven't given the ends a haircut, there at the end of the path at the left.
This is what we ended up with to resolve the spacing problem (making sure all the openings are less than 4")--this means that there are four slats and not three, which meant that I had to make another run to Pt Reyes yesterday so I had enough material when the rain let up today.
There is a side benefit to the denser spacing, however: the benches are more comfortable on the back!  Here's the corner looking pretty finished, although Muggs still has to cobble together a little trellis for the rose, which was thinned and pulled aside both for the deck and the septic inspection.

Wednesday, May 4, 2016

Bench bottom, and some remedial work

Today rain was in the forecast so last night after I buttoned up tools and made the jobsite shipshape I decided to seize the moment to address a nagging problem I had left untreated: some of the boards on the old deck were incredibly beefy, 1 5/8" or even thicker, and when I was milling them I stupidly just took off enough wood to make them look nice--but they were still thicker than most of the other boards.  In a deck like this one some irregularity is part of the charm, but "feet don't lie," and there were perceptible bumps or transitions where some of these thick boards met thinner ones.

So, off I went: since I had not fully screwed down the boards (I had about half the screws in--enough to hold everything together, but not full schedule), it was scarily fast to undo my hard work of a couple of weeks back, and leave gaps in the deck.  I left myself breadcrumbs in the form of notes on the ends of boards to help me quickly put them back in the right places, and as the clouds looked rainy I ran them through the planer a few times to bring them down to a little over 1 7/16" thick.  Then I ran the roundover bit on the edges to soften them, and when I emerged from downstairs, the sun was out.
This shows the boards back in place--the planing makes them slightly pinker than the boards that have been in the sun longer, although this late evening shot doesn't really capture it.
This was the big progress today after Tom arrived with a bit more lumber: I got the bench bottoms cut and attached, not 100% trivial given the angles involved.  This shot shows the newly milled wood more clearly than the previous one, I guess.  Hard to charge for my mistake, so I'll eat a few hours on that gaffe.
These miters aren't totally straightforward because of the angle of the bench itself: using the compound miter saw I cut the 45's on a slight angle from the vertical so the top edges meet more closely.  I ended up using different widths of boards (5 1/2, 4 1/2, 3 1/2 and 2 3/4), which is a nice look and which worked well with what we had around.

Now it's just slats and then I can start the true homestretch--milling the lumber for the stair treads and the stair pickets / balusters.  All the lumber is downstairs, so rain on!

Monday, May 2, 2016

Bench support and corner details


The bench supports went in pretty fast of course, but the corner is yet another three-dimensional geometry problem.  Having done it a few times before I was able to take some dimensions, but there were subtle differences between what was required at the Big House and what would work here.
Here I have mocked in the new corner and am test fitting it for height and for angles: again the back has to be a 22.5 degrees, and the support board has to be deeper than that of the other bench supports (the square root of 2 times that length, give or take a Pythagorean).  Who says that high school math never gets used?

I've laid boards on from either side to make sure that they match well enough--this will save nightmarish shims and cuts in the last couple of days of putting in bench boards themselves and rail slats--they have to meet neatly or the eye will go straight to them.

Here's the completed unit, with top cap sitting on its miter support.  The other step was to cut a slight bevel in the front edge of the top cap, so that the feel on a sitter's shoulders isn't jarringly irregular.
And here is what I came up with for the corner to the right of the top of the stairs; instead of the 22.5 that I thought I would need, I realized that would mean ridiculous kluges to fit the slats to connect to the vertical post.  So instead, I decided to keep the rail support in the same plane as the bench supports along the rose bush side, and again opted to hang the outside support along the edge of the rim--this means that the slats will match more neatly as they join to the vertical post.

I softened the corner slightly, both for aesthetic reasons and out of necessity: the dimensions of the deck itself were just a little too long to have full miters with 16' lengths of cap, and going up to 20' would have been that much more expensive.  As it stands, the only breaks in the rail are at the corners, which is kind of cool.
This shows the other corner, along with the fascia board.  Besides slats and benches, we still have to drill holes for the lower tails of the supports, sandwiching a block of wood to attach below the joist for added stability and longevity. The punchlist continues but we are CLOSE!

Rail top prep

Now that we have done this a few times (the 15-degree angled rails and bench supports), we sort of have the routine down--and maybe we can count on having the rail heights exactly what we want as we build them, and not have to cut their tops down.  As you might imagine, cutting consistent angles is very tricky, so...

that's where these babies come in handy.  They don't look like much, but they save a lot of time and hassle.  I invested probably a couple of hours back in 2010, and these two jigs create sawing guides for my circular saw--all the angles are pretty darned accurate, the short one for the bench supports and the longer one for the bench-less rails.
I just clamp the jig onto the assembly (praying that I have got the angle of the darned thing right, as it is bolted in with a mongo bolt below the deck surface), and then run the saw zip, zop to peel off a couple of small parallelogram-shaped pieces of 2 x 4.
And here's the jig for the bench support, with one of the blocks on the deck next to the other unit (unfortunately the blocks have a tendency to fly off into the rose bush...).
This shot shows the non-bench part of the deck (though bench supports could be added pretty easily to these uprights).  The far corner is one of those brain-teaser math problems: for the heights and the slats to match up as they come together with a 15 degree rake on each, the apex has to be angled at 22.5 degrees--and I make it a little shorter, so I can support the mitered corner more completely.  Farther to the left, I had to figure out how to make the rail meet the stairway post, and I think this will work out fine.
For some reason this detail tickled me.  Tom and I weren't sure how best to connect the angled rail to the vertical corner of the house, and I am not 100% sure this is the final answer.  I ended up lashing a 15 degree support to the corner, but it looked weird all alone.  Then I thought, why not add a block at the top?  And then, maybe a bit too whimsically, I whipped out the Skil saw and cut a super steep wedge to fit along the edge, parallel to the other support, so that it almost looks as if the support disappears into the siding.

Edging toward the finish line

With the rail supports bolted into place I was getting antsy to have a more finished look to the edges of the deck--there's no real rush to give the ends a haircut, but it represents an important step psychologically.

Once you've determined the best line (depends on the clearance from the rim joist, and also on whether there's a short deck board that dictates where the line has to go), it's time for the moment of truth.  I tend to measure, mark, re-examine, adjust, and re-examine, and then wait until morning for the actual cut.  This is a situation where "making loud mistakes" is a decidedly bad thing, but then you just breathe and go with the flow.
This light isn't great but that sun-lit rim joist is pressure-treated (greenish) and it begs to be covered with a fascia board.  Since it's already a double joist, I opted to cover it with 1x8 redwood that I ran through the planer a couple of times.
I'm not a big fan of miter joints, but this worked well--it's neat enough to pass muster even as it is low enough (from the stairs) to be very visible.  I'll add more screws and hope things don't buckle as they dry.
As I did on the decklet, I wanted to avoid having end-grain be the first thing you see as you climb the stairs, so I added a breadboard that had to be notched for the top stair posts.  This turned out to be more time-consuming and persnickety than I wanted it to be, and as it turns out, I'll probably re-do it with a wider board to cover the fascia below it.  Problem is, I need to find a high quality (fine grained) piece of wood, for durability and looks, and I am running short of really good material salvaged from the old boards from either project.


As you can probably tell from the light, I put in some loooong days working on the punchlist, but the results are very cool.